Tool Holder
by Caroline Carbo and Timothy Quan

Designs

The first design for our tool holder was created in OnShape. It was designed for additive manufacturing to print from the bottom upward so that the only supports were needed for the handle.

A CAD model of the redesigned part was created in OnShape. The part was much smaller in size than the first iteration and had much less material. The print time for a full scale print was reduced down to 14 hours. The part was designed for additive manufacturing by minimizing material and curves. Because of this, support structures were only needed underneath the part, and their removal did not affect the look of the part.

This was an improved design that arced the sides of the holder to remove material and filleted the insides of the compartments to improve print quality. The underneath side was also improved by doming the bottom to reduce the amount of supports needed. One issue with this design is that the visible arcs required supports which is not desirable for a side that will remain visible because it requires post processing to remove the imperfections formed when removing the supports.
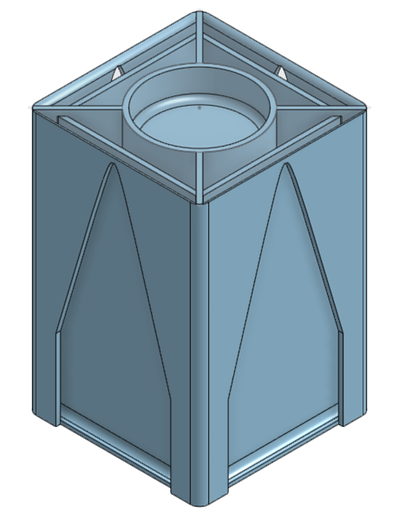
This was the final CAD model for the final print. It was created using OnShape. Note the internal fillets and conical sides to improve print quality, material usage, and print speed.
We designed a tool holder as an improvement to the Additive Manufacturing printing space that could hold the scrapers and other tools that came with the printers. Each successive prototype was better designed for additive manufacture (DFAM).
Printer and Material Specifications

All of the prints were made on a Flashforge Inventor printer, which is a fused deposition modeling (FDM) printer, using PLA plastic filament.
Prototypes

This was the print of our first design. In order for the print to not take over 33 hours, we scaled the model down to 25% of its original size. The print was so time consuming because of the thickness of the base, the overall size of the model, and the addition of a handle that needed a lot of supports. We decided to completely redesign the tool holder.
This was our second print. Since a print of the full scale model would take 14 hours, this print was scaled to 75% of its original size, the print speed was increased to 100mm/s, and the layer thickness was increased to .4mm so that the print took under 4 hours. Because the print was a lower quality, there are visible imperfections.

This print was the third design. We were finally able to print the part at a high quality at full size in about 12 hours. Unnecessary material was removed from the outer walls and printed in an arc shape to reduce support structures. After printing, we realized that the entire holder could actually be reduced in size by 10mm on each side and still fit all of the tools. We also played with the angles of the arcs and fillets to reduce support structures further.

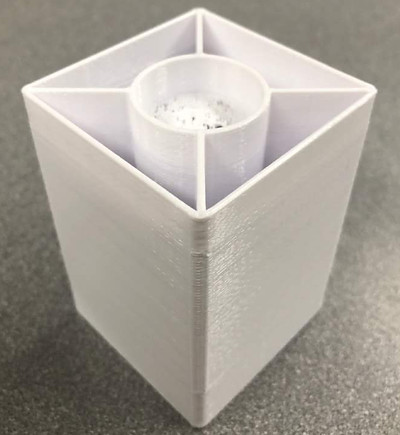
The final print required the fewest supports, which were only underneath the object. Therefore, none of the important visible features were damaged from the support structures. The final product, which printed in under 8 hours and required very little supports,The print quality was high
Comparison of the designs of the bottom of the tool holder
.jpg)

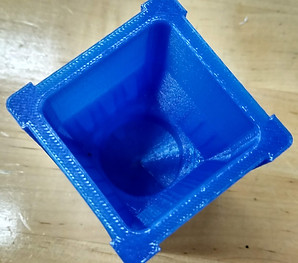
From left to right, the bottom of the design was refined to need increasingly less support structures. The right angles were turned into fillets which were then changed from circular to conical shapes in order to reduce supports further. In the end, there were only 4 small support structures in the corners where the cross section transitioned from square to circular.
Comparison of the designs of the sides of the tool holder

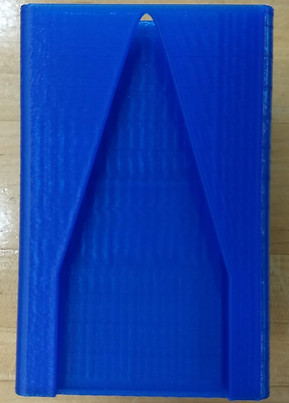
We decided to arc the sides of the tool holder because the material was not necessary to support a flat scraper tool. However, supports were still required when the arc was circular (left image), but supports were not required with a highly conical arc (right image).